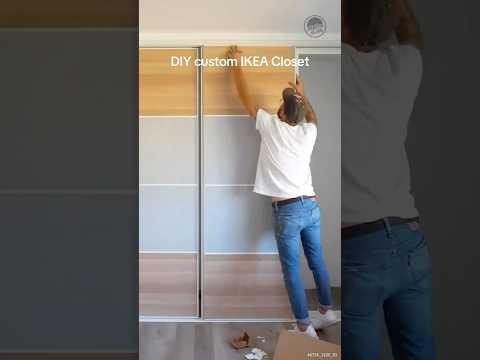
Installing IKEA Sliding Closet Doors: A Step-by-Step Guide
Are you looking to install IKEA sliding closet doors in your home? With the right tools and a little patience, you can save money on your home renovation project and achieve professional-looking results.
Here's a step-by-step guide on how to install IKEA sliding closet doors:
Tools and Materials Needed
To install IKEA sliding closet doors, you'll need the following tools and materials:
- IKEA sliding closet door system
- Drill press
- Random Orbital Sander (for smoothing out the door frame)
- Kreg Pocket-Hole Jig (for assembling the door frame)
- Carpenter Clamp Set (for holding the door frame together)
- Epoxy Resin Kit (for reinforcing the door frame)
- Measuring tape
- Level
- Safety glasses
- Power drill
- Socket set
- Wrench set
Before you start, make sure you have all the necessary tools and materials. If you're not comfortable with DIY projects, consider hiring a professional contractor through Local Services on It's Buzzing to help you with the installation.
Step 1: Prepare the Door Frame
Start by removing the old door frame or preparing the new one according to the manufacturer's instructions. Use a Random Orbital Sander to smooth out any rough edges or surfaces.
Next, use a Kreg Pocket-Hole Jig to assemble the door frame. This will help you create a sturdy and secure frame for your sliding closet doors.
Use a Carpenter Clamp Set to hold the door frame together while you assemble it. This will ensure that the frame is square and secure.
Once the door frame is assembled, use an Epoxy Resin Kit to reinforce the frame. This will add extra strength and durability to the frame.
Finally, use a measuring tape and level to ensure that the door frame is properly aligned and level.
Step 2: Install the Sliding Closet Doors
Now that the door frame is prepared, it's time to install the sliding closet doors. Start by attaching the doors to the door frame using the manufacturer's recommended hardware.
Use a power drill and socket set to attach the doors to the frame. Make sure the doors are properly aligned and level.
Next, use a wrench set to tighten the screws and secure the doors to the frame. This will ensure that the doors are properly attached and will not come loose over time.
Finally, use a level to ensure that the doors are properly aligned and level. You can also use a measuring tape to check the door's alignment and make any necessary adjustments.
Step 3: Add Finishing Touches
Once the sliding closet doors are installed, it's time to add the finishing touches. Start by adding any decorative trim or molding to the door frame.
Use a power drill and socket set to attach the trim or molding to the door frame. Make sure it's properly secured and level.
Next, use a Random Orbital Sander to smooth out any rough edges or surfaces on the door frame.
Finally, use a measuring tape and level to ensure that the door frame is properly aligned and level.
Conclusion
Installing IKEA sliding closet doors can be a DIY project that can save you money on your home renovation project. With the right tools and a little patience, you can achieve professional-looking results and enjoy the benefits of having a sliding closet door system in your home.
Remember to follow the manufacturer's instructions and take necessary safety precautions when working with power tools and materials. If you're not comfortable with DIY projects, consider hiring a professional contractor through Local Services on It's Buzzing to help you with the installation.
Additionally, you can explore local businesses on the map through BuzzPins Map to find professionals in your area who can help you with your home renovation project.
By following these steps and using the right tools and materials, you can install IKEA sliding closet doors with ease and achieve professional-looking results.